Creating, deploying and running applications
Creating an example application
After performing the necessary installation and configuration steps as described in the InCore Install Guide, you can now start the application development.
First start Qt Creator, open the File menu and select New File or Project. In the appearing dialog box select Other Project from the left handed menu and the Empty qmake Project template (Fig. 9).
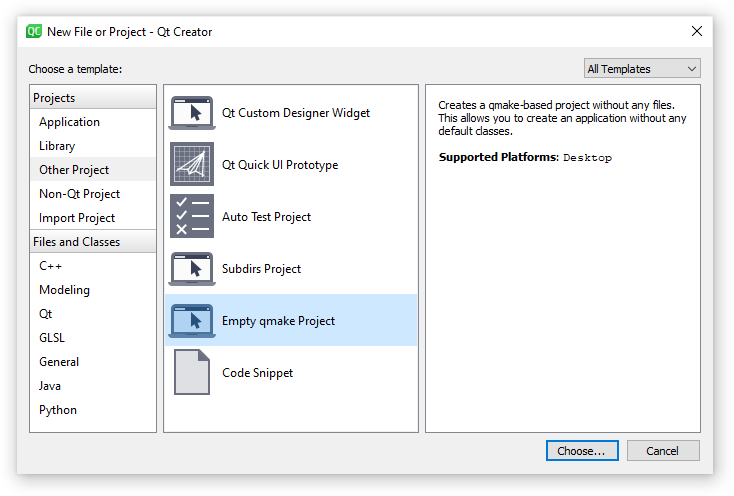
Fig. 9 Creating a new project in Qt Creator
In the appearing dialog box (Fig. 10), give your project the name test and choose its location.
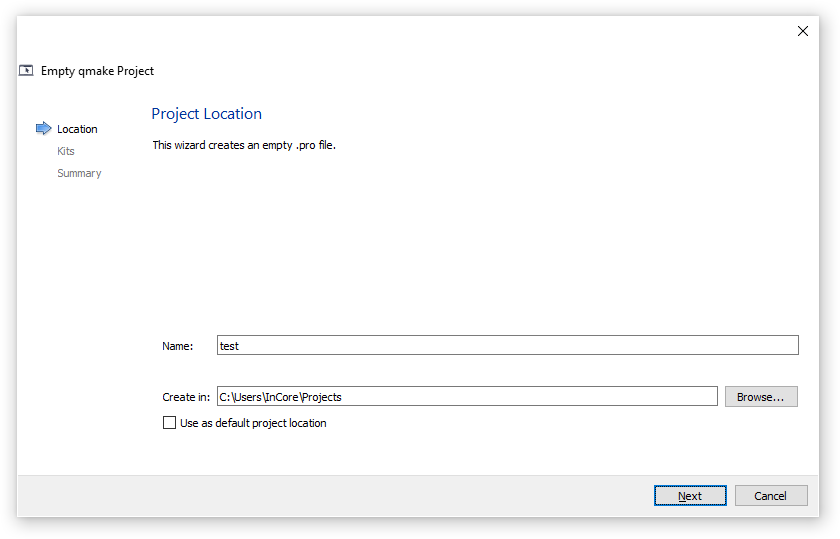
Fig. 10 Setting project name and location in Qt Creator
On the next page please select the kit you’ve created in one of the steps described in the InCore Install Guide (Fig. 11). Please press Finish on the next page.
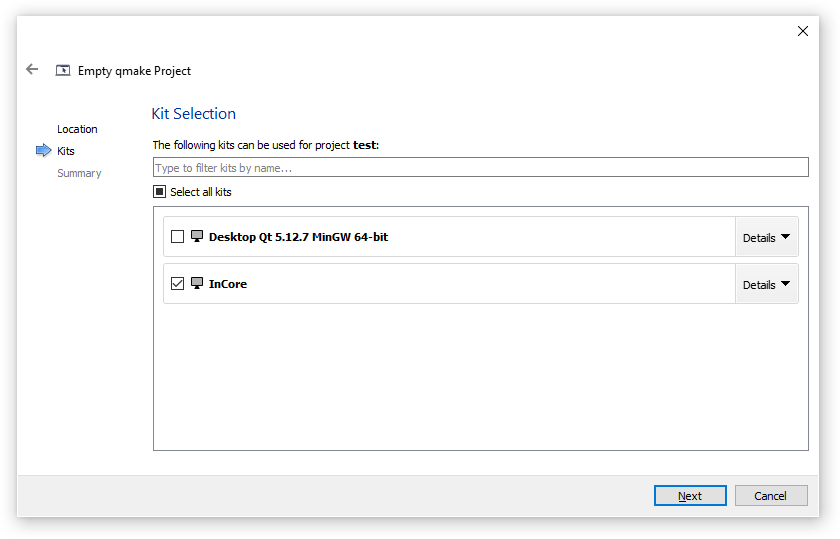
Fig. 11 Selecting kit for new project in Qt Creator
Now the project is created and Qt Creator should automatically open the project file test.pro. Replace all existing lines with the following and save it:
CONFIG = incore_app
TARGET = test
Now please add a new file to the project via the menu File → New File or Project and select Qt → QML File in the appearing dialog box (Fig. 12). Give it the name main.qml, press Next and Finish afterwards.

Fig. 12 Creating a new QML file in Qt Creator
Qt Creator automatically opens the new file main.qml in the text editor. Please remove the example code lines since they are not required for InCore apps.
Every InCore app has to import the InCore modules it wants to use. The basic module which is always required is called Foundation. To import it add the following line to main.qml:
import InCore.Foundation 2.0
An application should use Application as its root object:
Application {
}
Of course we want to start with a classic, so the final main.qml should look like this:
import InCore.Foundation 2.0

Application {
    onCompleted: console.log("Hello world!")
}
In the next section this example application will be deployed and run on a HUB-GM100.
Deploying and running an application
In order to deploy the app to a HUB-GM100, the Run Settings of your project have to be configured accordingly. Choose Projects from the left handed menu and edit the Run Settings as shown in Fig. 13:
If not already selected, change the deployment method to Remote Linux Host or add a new deployment method,
Change the Run configuration to Custom Executable (on HUB-GM100),
Change the Remote executable to
incore-cli,Change the Command line arguments to
run test.
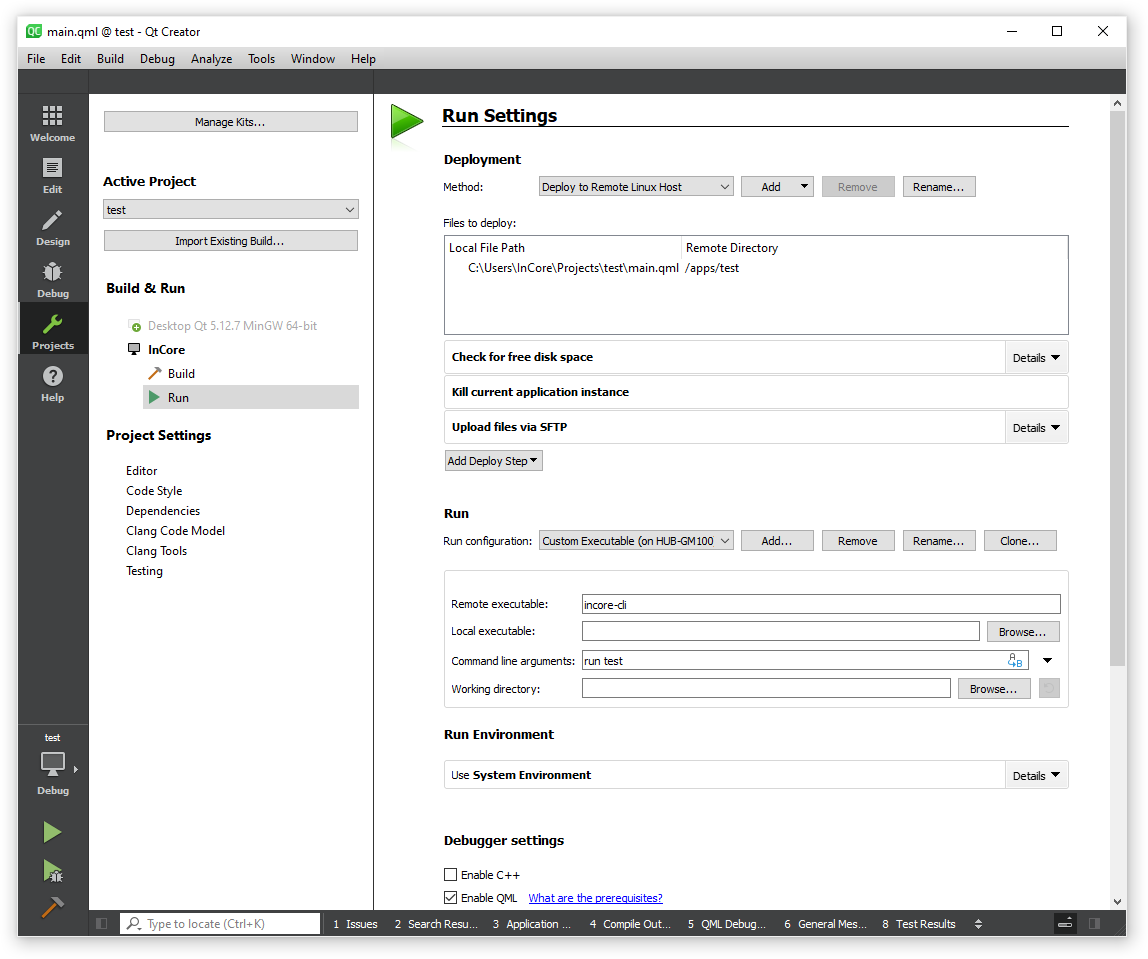
Fig. 13 Settings for running InCore apps on a HUB-GM100
Before the application can be deployed and started, the device needs to be put into development mode. In this mode the storage for apps is made writable, all running apps are stopped and the SSH service is being started. To activate development mode, start a PuTTY session and log in as described in section Logging in in the SIINEOS Manual. After logging in enter the command incore-cli dev start (Fig. 14).
The development mode can later be stopped again via incore-cli dev stop or by rebooting the device.
Important
The development mode is only activated temporarily. Once the device is rebooted or powered off, the device starts in regular non-development mode again.
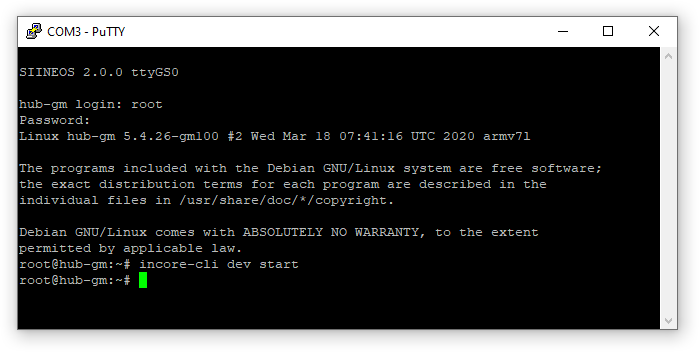
Fig. 14 Starting development mode on a HUB-GM100
Now switch back to the editor window of the Qt Creator. The application can now be run by clicking Build → Run from the main menu or using the shortcut Ctrl+R or by pressing the green play button in the left handed menu.
If all steps have been followed properly, the application will be started and print its output to the IDE as shown in Fig. 15.
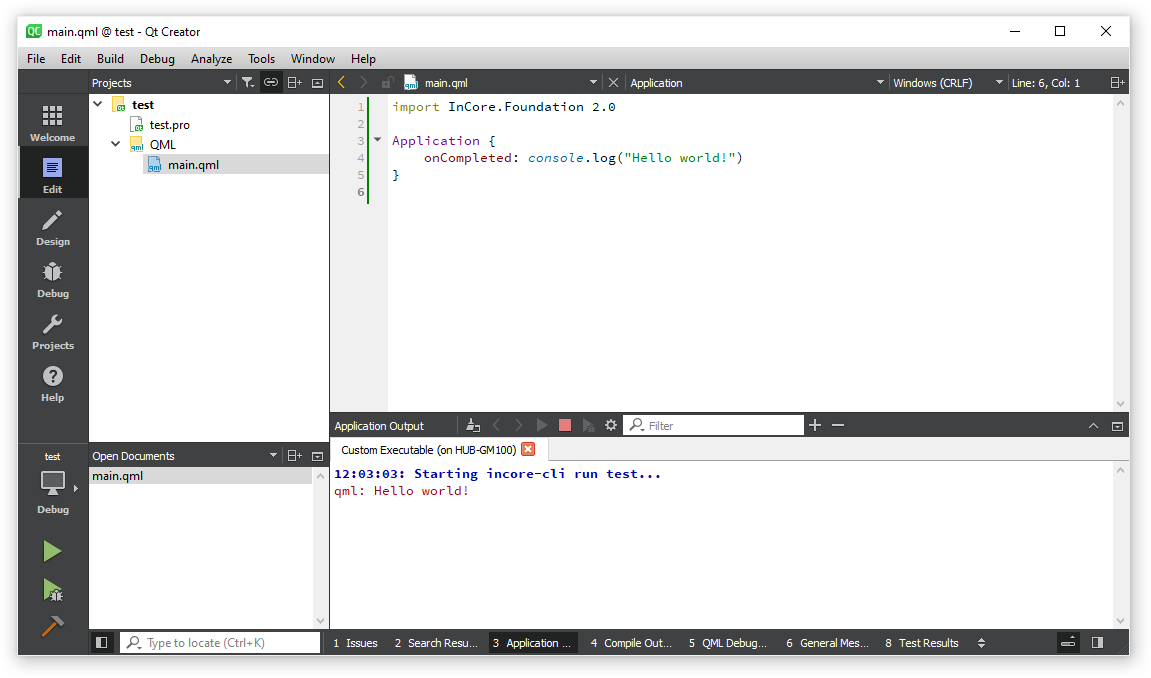
Fig. 15 Output of the test application running on a HUB-GM100
Note
Whenever an application is deployed, it is stored permanently in the /apps/<APPNAME> directory. It will be started automatically on every start of the HUB-GM100. In general when SIINEOS boots, it creates an application instance for every subdirectory inside /apps containing a file called main.qml.
Congratulations, you’ve successfully deployed and started your first application on a HUB-GM100! Now you can start playing with the HUB-GM100 and continue with the InCore tutorials.